My 2022 new coding insight in the Post COVID-19 era

Hello guys, our Code A Star website has gone on hiatus for more than a year. And finally, we are back online! Many things were changed last year because of the COVID-19 pandemic. Many people, including me, have felt frustrated on living with the COVID-19 for more than 2 years. But I believe things should go better in the future by analyzing more data and researching more solutions. As long as we keep updating ourselves on facing different situations (updating our own learning epochs), a more accurate output should come out eventually. Similar to most of the machine learning cases, it takes time.
We call our website as CodeAStar. The original idea is, instead of wishing upon a star, we code a star for making a wish ourselves. But I haven't thought about how do we code a star before in fact. So, for our first 2022 coding mission, let we code a star!
Design A Star
It likes all of our software projects in past, we go for the Software Development Life Cycle (SDLC) way: define the software requirements first then design our implementation. The things we want are:
- a star graphic generated by code
- configurable
- reusable
- randomized
- plain and easy!
In order to create a star graphic using coding, first we will need a programming library that can create graphics. Second, we will code several geometries to form a star, so it means we will need geometry formulas. In order to make our program configurable, we will need a configuration file and this configuration file should be easy to read and modify. For the reusability, we expect our program can product a star graphic every time, without affecting our previous creations. The randomized requirement is pretty straight forward, we can use functions to generate required parameters randomly. And for the plain and easy part, of course we will keep using our favorite Python language.
Okay, we have a plan according to the above requirements, let' see what we will have right now:
- Language: Python
- Libraries: Math (for geometry related functions), Turtle (for graphic creation), Pillow (for graphic output processing), Random (the name just says it all)
- Configuration file: YAML (because of its high readability)
Code A Star
We start our coding mission by setting up our development using the good O' pipenv.
$pipenv --three
$pipenv shell
$pipenv install pyyaml
$pipenv install pillow
You can see there are 2 python libraries, pyyaml and pillow. We use pyyaml to read our YAML configuration file and pillow to convert our graphical output into png format. From our YAML configuration file, we have following items:
screen:
  size: 300   #initial screen size
  percentage change: 50   #percentage of screen size variation
  margin: 20   #distance ratio between the adjacent and the screen edge

star:
  opposite:   #the length of opposite is depended on adjacent
    ratio to adjacent:   #the length of adjacent is depended on the screen size
      min: 0.3
      max: 0.7
  point:   #the number of points of a star
    min: 4
    max: 11
  starting angle:   #the starting rotating of the first point
    min: -90
    max: 90
  distance from center:  #distance ratio between the points and the center
    min: 0
    max: 1

path: stars   #folder path to store the graphics
The configuration is divided into 3 parts: screen, star and path. While the screen and the path are straight-forward, then the star is the part we would like to talk more about.
Our star graphic is built by several right triangles. So it is time to dig out related mathematical formulas and properties from Google.
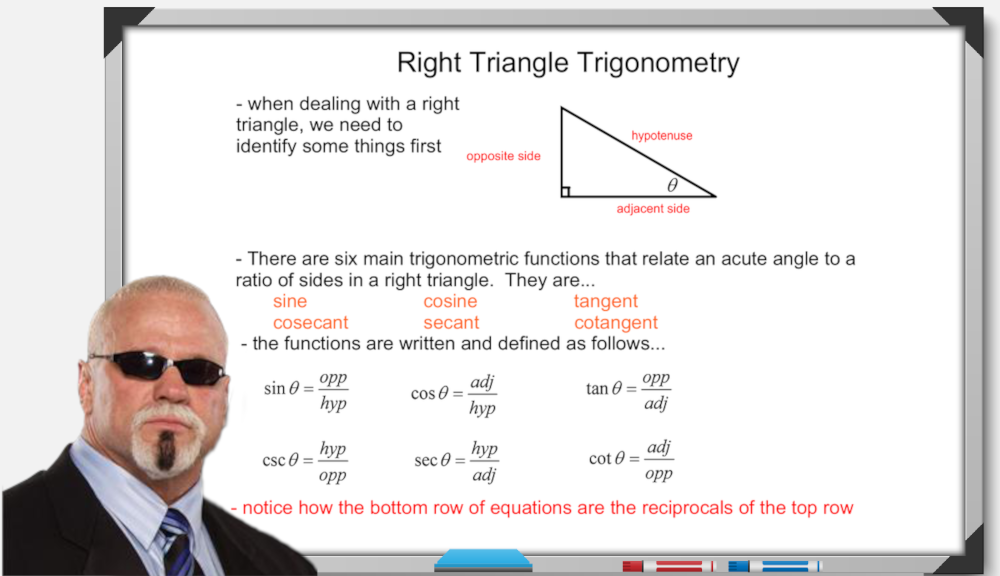
We have adjacent and opposite properties entered from our YAML configuration file, thus we can generate the hypotenuse and the acute angle of our triangle.
Code A Star (cont.)
After the Math class, let's move to our programming class. As usual, we start importing our libraries and initializing required modules.
import turtle, math, random, os, yaml, sys
from datetime import datetime
from PIL import Image

dt_string = datetime.now().strftime("%d%m%Y_%H%M%S")     #get current datetime string

config_file = sys.argv[1] if len(sys.argv) >= 2 else "config.yml"      #get the configuration file from command line or use the default one
with open(os.path.dirname(os.path.abspath(__file__))+os.path.sep+config_file, 'r') as yaml_file:
  star_config = yaml.safe_load(yaml_file)
yaml_file.close()

codeastar = turtle.Turtle()    #initialize our turtle instance
Then we get all the properties from our configuration file. And we also create a folder to store our star graphics.
length = star_config["screen"]["size"]
change_range_percent = star_config["screen"]["percentage change"]
margin = star_config["screen"]["margin"]
opposite_range_min = star_config["star"]["opposite"]["ratio to adjacent"]["min"]
opposite_range_max = star_config["star"]["opposite"]["ratio to adjacent"]["max"]
point_min = star_config["star"]["point"]["min"]
point_max = star_config["star"]["point"]["max"]
starting_angle_min = star_config["star"]["starting angle"]["min"]
starting_angle_max = star_config["star"]["starting angle"]["max"]
distance_from_center_min = star_config["star"]["distance from center"]["min"]
distance_from_center_max = star_config["star"]["distance from center"]["max"]
star_path = star_config["path"]

star_path = (star_path+os.path.sep) if os.path.sep != star_path[-1] else star_path
os.makedirs(os.path.dirname(star_path), exist_ok=True)
Here comes the math! As we have mentioned earlier, we would like to make our program reusable, so we provide random properties to make it generate a different output on each run. There are two type of random functions we are using: random.uniform() and random.randrange(). The .uniform() function generates a randomized float number, while .randrange() returns a randomized integer within the inputted range.
For the mathematical formulas, we use math.hypot() to calculate the length of the hypotenuse. This function is equal to √(adjacent2 + opposite2). Then we use math.atan() to find the angle of our right triangle. Firstly, according to the above "Math Lesson from Prof. Steiner", we have several ways to find out the angle θ in a right triangle. Since we only use adjacent and opposite, we got 141 2/3 chance of using tangent function to find out the angle! We know tan θ is opposite over adjacent. In order to find the θ of tan θ we need arctangent, the inverse of tangent. So we have math.atan(tan θ), i.e. math.atan(opposite/adjacent). Is that the thing we want? No, not yet, math.atan() returns a radian value, we need math.degrees() to convert it to degree, the thing that we want.
distance_from_center = random.uniform(distance_from_center_min, distance_from_center_max)
adjacent = round((screen_length/(3.5 if (distance_from_center > 0.45) else 2.4))*(1-margin/100))
opposite = round(adjacent * random.uniform(opposite_range_min, opposite_range_max))
point = random.randrange(point_min, point_max)
starting_angle = random.randrange(starting_angle_min, starting_angle_max)
hypotenuse  = math.hypot(adjacent,opposite)
angle = math.degrees(math.atan(opposite/adjacent))
next_angle = 90 - angle
point_angle = 360/point
Move the Turtle
We have mentioned that we use a "Turtle" to create our star. And the Turtle is a Python pre-installed library for graphics creation. We can control the turtle to draw lines, connect lines into a shape and fill up with colors. The ways to control the turtle are straight-forward and we use following functions to draw our star:
- turtle.up(): pick up the turtle, so it won't leave a line on our canvas
- turtle.down(): put down the turtle to the canvas and let it draw a line
- turtle.forward(): as it says, let the turtle move forward
- turtle.backward(): let the turtle do moon walk :]]
- turtle.left(): turn the turtle clockwise in certain degrees
- turtle.right(): turn the turtle anti-clockwise in certain degrees
- turtle.color(): set the line and fill colors in RGB format, please note that the RGB values here are in 0 to 1 format
- turtle.begin_fill(): fill up the shape with the color setting
- turtle.end_fill(): stop the color filling
- turtle.hideturtle(): remove our turtle cursor on our canvas
Then you may see a strange code block there commented as "position handler". The purpose of this code segment is to reposition the starting location, in order to make our graphics been drawn within the canvas. It is a quick workaround actually, the proper way should be using machine learning to train a model calculating the suitable starting position.
if ((starting_angle>45) or (distance_from_center > 0.45) or (starting_angle<-45) ):   #position handler
  codeastar.up()
  if (starting_angle>45):
    codeastar.forward(starting_angle/2)
  if (distance_from_center> 0.45):
    codeastar.backward(distance_from_center*14.5)
    if (distance_from_center> 0.8):
      codeastar.backward(distance_from_center*10+point*-7)
      codeastar.left(90)
      codeastar.forward(distance_from_center*16+point*5)
      codeastar.setheading(0)      #back to initial heading position
  if (starting_angle<-45):
    codeastar.forward(starting_angle/2)
  codeastar.down()
codeastar.right(starting_angle)
for i in range(point):
  codeastar.color((random.random(),random.random(),random.random()),(random.random(),random.random(),random.random()))
  codeastar.begin_fill()
  codeastar.right(point_angle if (i>0) else 0)
  codeastar.forward(adjacent)
  codeastar.right(180-angle)
  codeastar.forward(hypotenuse)
  codeastar.right(180-next_angle)
  codeastar.forward(opposite)
  codeastar.end_fill()
  codeastar.up()                        #set the next position
  codeastar.backward(opposite*distance_from_center)
  codeastar.right(90)
  codeastar.forward(opposite*distance_from_center)
  codeastar.down()
codeastar.hideturtle()
When we run the above code snippet, we are going to have a star like the following outputs:
Final Cut
Finally, a star is born! We have our star graphic on the screen and we would like to save it to a file. Since Turtle has a .getcanvas().postscript() function, we can use it to save the canvas(the content we see on the Turtle window) into an encapsulated PostScript (eps) format. Although PostScript format is good for storing vector graphics and can be opened by Adobe Reader, we prefer a simpler way to read the file. So we use Pillow image library to convert the PostScript file into a PNG file. After the conversion of the PostScript file, we should remove it from the file system as well.
screen.getcanvas().postscript(file=f"{star_path}{dt_string}.eps")
img = Image.open(f"{star_path}{dt_string}.eps")
img.save(f"{star_path}{dt_string}.png")
img.close()
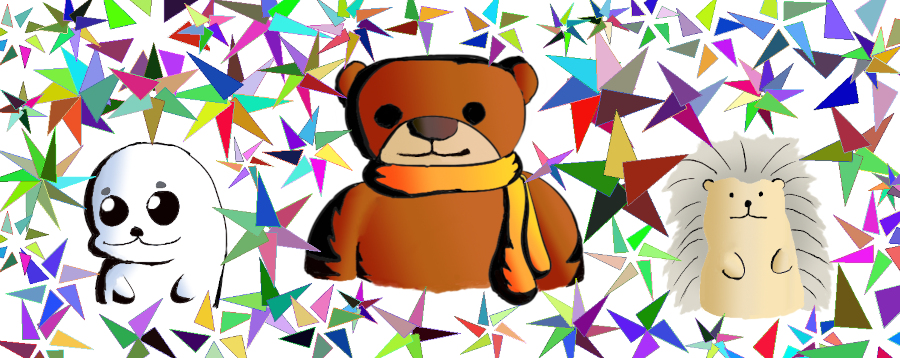
os.remove(f"{star_path}{dt_string}.eps")When we run the whole code snippets together, we will see the Turtle draw a star using randomized properties. Then the star graphic will be saved into a PNG file with current datetime as the file name. Since there are random properties used in our program, whenever we run it, it will generate a different and unique star graphic for us. You may also notice that the feature image of this post is using it to create as well. Thus, even I can't create the same image again :]] .
What have we learned in this post?
- Use YAML to load properties in Python
- Create graphics using Turtle library
- Use Pillow to create PNG file
- Mathematics of right triangle!
(the complete source package can be found at GitHub: https://github.com/codeastar/codeastar)