Easy Weather Forecast Flask Web App with Python


We have tried to code an Easy Weather Forecast Tool with Python. Yes, it is fast and easy, but it is just not that convenient to run anything on a command prompt. It is so.... 80s. It would be better if we can make a single-page Flask web app. Then we can run the weather forecast tool on a browser in anywhere. Isn't it cool? Yeah! Okay, requirement is defined, let's build our project!
Planning Stage
Other than the "single-page web app" requirement, we have another hidden requirement as well, it is "fast and easy" (who doesn't like fast and easy?). Luckily we are in the Python world, so "fast and easy" is never a miracle to us. Before we go further in our development, let's use pip to install a Python module, the "pipenv" for our development environment. >pip install pipenv Pipenv is not a functional module in our project, but an officially recommended Python packaging tool from Python.org. We use it before we start our project. The pipenv is a combination of virtual environment and pip. We can create a virtual environment from it, then install / uninstall modules within the environment and *automatically* maintain the list of the modules.
Start our project with pipenv
After the installation of pipenv, we can set up a directory for our project. Let's call it "ezw" then (stands for EZ Weather forecast, okay, I admit it, I am a huge wrestling mask, EZW! EZW! EZW!). >mkdir ezw >cd ezw And we initialize a Python 3 environment. >pipenv --three (Note: for Mac users with Anaconda Python, when you face "dyld: Library not loaded" error, you may need to run Anaconda Distribution of virtualenv first) >conda install virtualenv [reference: Anaconda's community group]
When the virtual environment is set, we can install following modules with pipenv:
- Flask - a micro web application framework
- Flask-CORS - an optional module for CORS handling (more details later)
- Requests - the name says it all, a HTTP library :]]
- GeoPy - a Python geocoding library
>pipenv install flask >pipenv install flask-cors >pipenv install requests >pipenv install geopyThen we will find Pipfile and Pipfile.lock files generated in our working directory. The Pipfile is the list of our dependencies. Thus we can bring the Pipfile to a new location and install the dependencies, by typing: >pipenv install That's it! And the Pipfile.lock is the file for storing version and environment details.
When we are ready, we can run:
>pipenv shell
to start our virtual environment with required libraries.
The Model, the View and the Controller in the Flask
Okay, we are now going to make our web app under the Model-View-Controller (MVC) pattern in the Flask framework. First, we create a model file (let's name it "ezw_model.py") under our working directory. A model file is a place where we define an data object for our web application. In our case, we define the weather report object here. class WeatherReport(): def __init__(self, date, max_temperature, min_temperature, summary, raining_chance, icon): self.date = date self.max_temperature = max_temperature self.min_temperature = min_temperature self.summary = summary self.raining_chance = raining_chance self.icon = icon Our weather report model is made of date, maximum and minimum temperatures, chance of raining, weather icon and the summary.
We then move to create our controller files, let name the first file as "ezw_controller.py". The source code is basically the one we did on our Easy Weather Forecast Tool project. This time, we just put the outputs in an array of weather report models, instead of printing them directly.
from ezw_model import WeatherReport from geopy.geocoders import Nominatim from datetime import datetime,timedelta import requests, os DARK_SKY_API_KEY = os.environ['DARK_SKY_KEY'] option_list = "exclude=currently,minutely,hourly,alerts&units=si" class EZWController: def getLocation(self, input_location): location = Nominatim().geocode(input_location, language='en_US') return location def getWeatherReports(self, data, location): date_from = data['date_from'] date_to = data['date_to'] d_from_date = datetime.strptime(date_from , '%Y-%m-%d') d_to_date = datetime.strptime(date_to , '%Y-%m-%d') delta = d_to_date - d_from_date latitude = str(location.latitude) longitude = str(location.longitude) weather_reports = [] for i in range(delta.days+1): new_date = (d_from_date + timedelta(days=i)).strftime('%Y-%m-%d') search_date = new_date+"T00:00:00" response = requests.get("https://api.darksky.net/forecast/"+DARK_SKY_API_KEY+"/"+latitude+","+longitude+","+search_date+"?"+option_list) json_res = response.json() report_date = (d_from_date + timedelta(days=i)).strftime('%Y-%m-%d %A') unit_type = '°F' if json_res['flags']['units'] == 'us' else '°C' min_temperature = str(json_res['daily']['data'][0]['apparentTemperatureMin'])+unit_type max_temperature = str(json_res['daily']['data'][0]['apparentTemperatureMax'])+unit_type summary = json_res['daily']['data'][0]['summary'] icon = json_res['daily']['data'][0]['icon'] precip_type = None precip_prob = None raining_chance = None if'precipProbability' in json_res['daily']['data'][0] and 'precipType' in json_res['daily']['data'][0]: precip_type = json_res['daily']['data'][0]['precipType'] precip_prob = json_res['daily']['data'][0]['precipProbability'] if (precip_type == 'rain' and precip_prob != None): precip_prob *= 100 raining_chance = "Chance of rain: %.2f%%" % (precip_prob) ezw_wr = WeatherReport(report_date, max_temperature,min_temperature, summary, raining_chance, icon) weather_reports.append(ezw_wr) return weather_reports
After that, we create an application controller, "ezw_app.py". It is the backbone of our ezw web app in the flask framework. Other than the flask module, you may notice we have imported a flask_cors module there. Since we are making a web app with API, there are a lot of HTTP requests sending in and out of our app. It would be a pain in the <you know what>, if those requests cannot be made between different domains. Thus we enable CORS (Cross-Origin Resource Sharing) in flask to handle this issue.
from flask import Flask, render_template, request from flask_cors import CORS from ezw_controller import EZWController app = Flask(__name__) CORS(app)
We create 2 routes in our app controller, one is the index route which displays the weather query template of our ezw web app. Another route is the POST request handler for calling up our ezw_controller.
@app.route("/") def index(): return render_template('index.html') @app.route('/ezw', methods=['POST', 'GET']) def ezw(): if request.method == 'POST': data = request.json input_location = data['location'] ezw = EZWController() geo_location = ezw.getLocation(input_location) if geo_location == None: ezw_address = "Unknown location" report_template = render_template('reports.html', weather_address=ezw_address) return report_template ezw_address = geo_location.address ezw_reports = ezw.getWeatherReports(data, geo_location) report_template = render_template('reports.html', weather_address=ezw_address, weather_reports=ezw_reports) return report_template if __name__ == '__main__': app.run(debug=False,host='0.0.0.0')
View the View
Now we have the Model and the Controllers, it is time to work on the View. From the ezw_app.py, you may spot 2 templates there, index.html and reports.html. The index template is the view of our weather query form, while the reports template is the view of our ezw report.
Please note that Flask is using Jinja2 template engine, you can visit this link for more Jinja2 details. And our "views" are stored under "templates" sub-directory.
Thus our web app file structure should look like:
\ezw | ezw_app.py | ezw_model.py | ezw_controller.py \templates | index.html | reports.html
In our index.html query form view, we are using following JavaScript and CSS libraries:
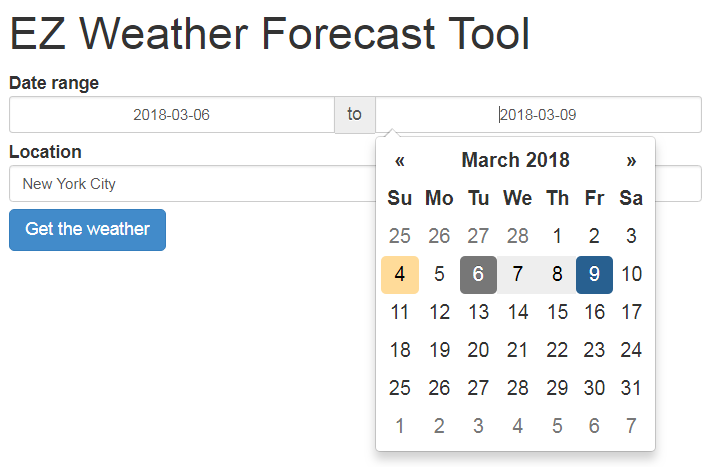
So we import those links in the index.html view: <head> <script src="https://cdnjs.cloudflare.com/ajax/libs/jquery/3.3.1/jquery.min.js"></script> <link id="bs-css" href="https://netdna.bootstrapcdn.com/bootstrap/3.0.3/css/bootstrap.min.css" rel="stylesheet"> <link id="bsdp-css" href="https://cdnjs.cloudflare.com/ajax/libs/bootstrap-datepicker/1.7.1/css/bootstrap-datepicker3.min.css" rel="stylesheet"> <script src="https://cdnjs.cloudflare.com/ajax/libs/bootstrap-datepicker/1.7.1/js/bootstrap-datepicker.min.js"></script> <link id="weather-css" href="https://cdnjs.cloudflare.com/ajax/libs/weather-icons/2.0.9/css/weather-icons.min.css" rel="stylesheet"> </head> And create our query form with Datepicker: <div class="row"> <div class="col-md-6"> <label style="width: 100%;">Date range <div id="ezw-dateinput"> <div class="input-daterange input-group" id="datepicker"> <input type="text" class="input-sm form-control" name="date_from" id="date_from" /> <span class="input-group-addon">to</span> <input type="text" class="input-sm form-control" name="date_to" id="date_to" /> </div></div> </label> </div> </div> <div class="row"> <div class="col-md-6"> <label style="width: 100%;">Location <input type="text" class="input-sm form-control" id="location" name="location" required> </label> </div> </div> <div class="row"> <div class="col-md-6"> <button type="button" class="btn btn-primary" id="gtw">Get the weather</button> </div> </div> <div class="row"> <div class="col-md-12" id="result"></div> </div> Add JavaScript here to interact with our Flask controller using AJAX. <script> $(document).ready(function () { $('#ezw-dateinput .input-daterange').datepicker({ format: "yyyy-mm-dd", todayHighlight: true });
  $('#gtw').click( function() {
      var data ={}; data['location'] = $('#location').val();
      data['date_from'] = $('#date_from').val();
      data['date_to'] = $('#date_to').val();

      $('#result').empty();

      $.ajax({
          type : "POST",
          url : "{{ url_for('ezw') }}",
          data: JSON.stringify(data),
          contentType: 'application/json;charset=UTF-8',
          success: function(result) {
                $('#result').html(result);
          }
      });
   });
});
</script>
The UI should look like:
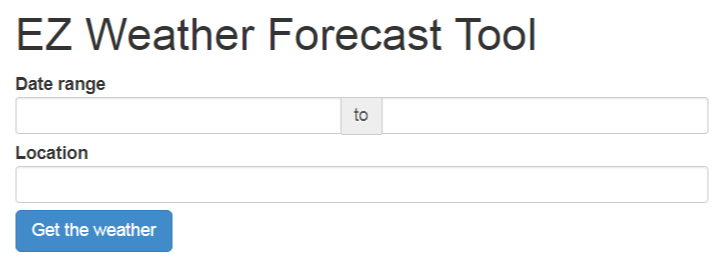
The view of our query form is ready, just don't click the "Get the weather" button at this moment. Because, we just haven't made the view of weather reports yet.
Build the weather report
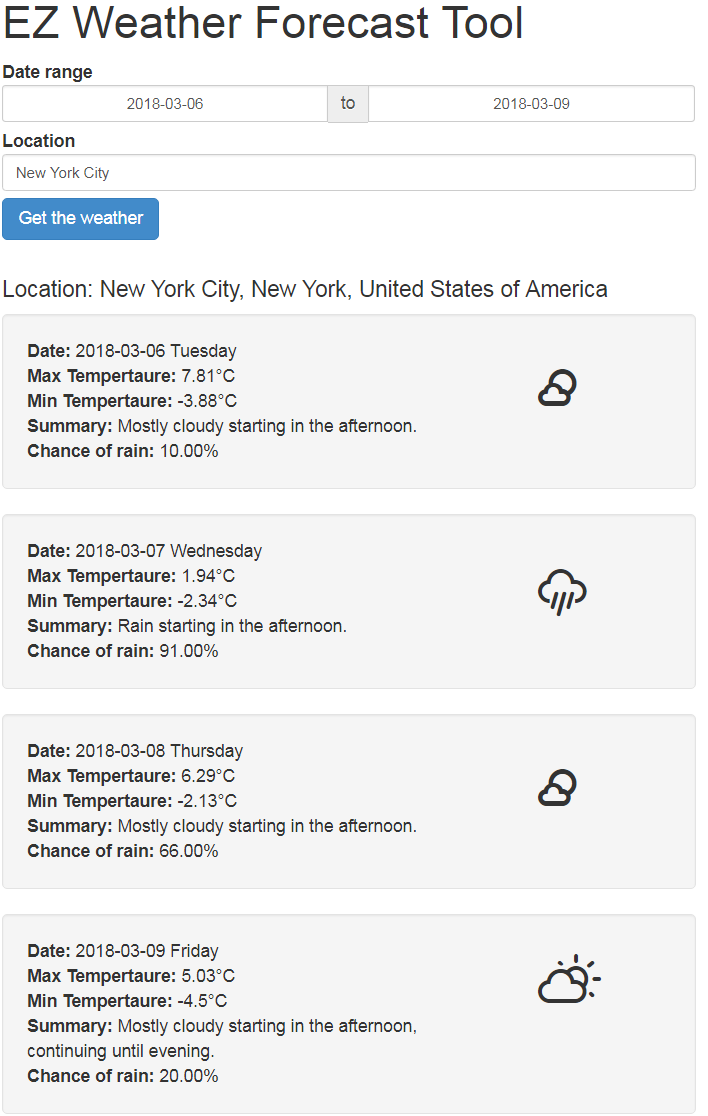
Our weather report will contain: a date, max and min temperatures, a summary and a weather icon. We can get all the information from our controller, "ezw_controller.py" file. What we need to do next, is putting all those information in our view, the "reports.html".
The "reports.html" view is a loop of division element showing weather information in Jinja2 syntax.
<div class="row"> <div class="col-md-6"> <h4>Location: {{ weather_address }}</h4> </div> </div> {% for report in weather_reports %} <div class="row"> <div class="col-md-6"> <div class="well"> <div class="row"> <div class="col-xs-9"> <b>Date:</b> {{ report.date }}<br/> <b>Max Tempertaure:</b> {{ report.max_temperature }}<br/> <b>Min Tempertaure:</b> {{ report.min_temperature }}<br/> <b>Summary:</b> {{ report.summary }}<br/> {% if report.raining_chance %} <b>Chance of rain:</b> {{ report.raining_chance }}<br/> {% endif %} </div> <div class="col-xs-3"> <h1> {% if report.icon == "clear-day" %} <i class="wi wi-day-sunny"></i> {% elif report.icon == "clear-night" %} <i class="wi wi-night-clear"></i> {% elif report.icon == "rain" %} <i class="wi wi-rain"></i> {% elif report.icon == "snow" %} <i class="wi wi-snow"></i> {% elif report.icon == "sleet" %} <i class="wi wi-sleet"></i> {% elif report.icon == "wind" %} <i class="wi wi-windy"></i> {% elif report.icon == "fog" %} <i class="wi wi-fog"></i> {% elif report.icon == "cloudy" %} <i class="wi wi-cloudy"></i> {% elif report.icon == "partly-cloudy-day" %} <i class="wi wi-day-cloudy"></i> {% elif report.icon == "partly-cloudy-night" %} <i class="wi wi-night-partly-cloudy"></i> {% endif %} </h1> </div> </div> </div> </div> </div> {% endfor %}
The code above is pretty straight forward which displays information from our ezw model. But, you may discover one thing different from other programming languages there.

It is because we can simply use if/else statements to perform the switch-case logic. No kidding, it is the official answer from Guido van Rossum, the father of Python.
After building the weather report view, we have finished all the MVC components of our Flask web app.
Gentlemen, start your (Flask) engines
The time is now, we can run our Flask web app here. But first, we need to set the Dark Sky API key as an environment variable. >export DARK_SKY_KEY=[your Dark Sky API key] or (for Windows OS) >set DARK_SKY_KEY=[your Dark Sky API key] Then, we can type "python ezw_appy.py" to start our application >python ezw_app.py * Running on http://127.0.0.1:5000/ Open a web browser and go to "http://127.0.0.1:5000/". Our Easy Weather Forecast Tool is now online (in local network :]] ).
Try filling up the query form, then press "Get the weather" to receive the reports in our single-page web app.
"Ta-Da!"
Hope you all can enjoy this EZW web app. You can build extra features on it, like an auto-fill function on location or add more fields on the report view model. Feel free to try and explore the code, and make your own customized weather forecast app.
What have we learnt in this post?
- usage of pipenv
- usage of Flask framework
- implementation of MVC pattern
- implementation of single-page web app
The complete source package can be found at: https://github.com/codeastar/ez_weather_forecast_with_flask