Flask Backend and React Frontend for Weather Forecast - Part 1


We built a weather forecast web app with Flask in past. That was an old fashioned way which we handled all frontend and backend stuff under Flask framework. The best practice for web applications nowadays is separating frontend and backend into 2 modules. So we can utilize both modules to their max capability.
Let's think about we are playing a fantasy role playing game. As a hero in early stage, we have a bard companion who can do magic and sword fighting. And we have no problem fighting monsters in our early journey. But when we go deeper and face bigger challenges, we realize we need to re-arrange our strategy. We need more and higher level of magics and fighting skills. Thus we find our new companions, a mage who focuses on casting magic at the back and a sword swinger who deals with trouble at the front. And in this post, we are going to talk about our magic user at the back --- the backend module.


RESTful Backend Module
What is a RESTful backend? It is a backend module that aims to run web services in a fast and reliable way. Those web services use standard and predefined textual representations (e.g. XML or JSON) for information exchange operations (GET / POST / PUT / DELETE) . Thus it is easy for others (frontend modules) to send request to and receive response from backend module. We have built the EZ Weather Forecast web app (EZW) with Flask before. And Flask is a microframework of Python to build a web app, Flask RESTful is its RESTful version to build a RESTful backend, which also focuses on small and fast in development cycle. How fast the development cycle is in Flask RESTful? It is no better way to try it out ourselves, so let's roll!
Flask RESTful backend in action
First of all, let's create our development folder.
$mkdir ezw_restful
$cd ezw_restful
Then use pipenv to create our development environment and install required libraries.
$pipenv --three
$pipenv install flask
$pipenv install flask-cors
$pipenv install flask-restful
$pipenv install requests
As we have built the EZW with Flask before, we can reuse most of it on our new Flask RESTful backend. Let's download or fork our EZW source from GitHub. From the ezw folder, we can keep the weather report model file, ezw_model.py. Before we go further, let's think about the request interface when frontend modules try to make a call to us. We require them to send us date range and location information in JSON format. So we have:
{
   "latitude": <0.0000>,
   "longitude": <0.0000>,
   "start_date": <YYYY-MM-DD>,
   "end_date": <YYYY-MM-DD>
}
Then we work on the EZW's core logic file, ezw_controller.py. First, we rename it to ezw_restful_controller.py to identify the difference. Of course, renaming the file to restful won't make our service restful :]] . What we do is changing our output to JSON object, in order to make a restful response. On our ezw_restful_controller.py file, we change our code to:
from ezw_model import WeatherReport from datetime import datetime,timedelta import requests, os, json DARK_SKY_API_KEY = os.environ['DARK_SKY_KEY'] option_list = "exclude=currently,minutely,hourly,alerts&units=si" class EZWRController: def getWeatherReports(self, date_from, date_to, latitude, longitude): d_from_date = datetime.strptime(date_from , '%Y-%m-%d') d_to_date = datetime.strptime(date_to , '%Y-%m-%d') delta = d_to_date - d_from_date latitude = str(latitude) longitude = str(longitude) weather_reports = [] for i in range(delta.days+1): new_date = (d_from_date + timedelta(days=i)).strftime('%Y-%m-%d') search_date = new_date+"T00:00:00" response = requests.get("https://api.darksky.net/forecast/"+DARK_SKY_API_KEY+"/"+latitude+","+longitude+","+search_date+"?"+option_list) json_res = response.json() report_date = (d_from_date + timedelta(days=i)).strftime('%Y-%m-%d %A') unit_type = '°F' if json_res['flags']['units'] == 'us' else '°C' min_temperature = str(json_res['daily']['data'][0]['apparentTemperatureMin'])+unit_type max_temperature = str(json_res['daily']['data'][0]['apparentTemperatureMax'])+unit_type summary = json_res['daily']['data'][0]['summary'] icon = json_res['daily']['data'][0]['icon'] precip_type = None precip_prob = None raining_chance = None if'precipProbability' in json_res['daily']['data'][0] and 'precipType' in json_res['daily']['data'][0]: precip_type = json_res['daily']['data'][0]['precipType'] precip_prob = json_res['daily']['data'][0]['precipProbability'] if (precip_type == 'rain' and precip_prob != None): precip_prob *= 100 raining_chance = "%.2f%%" % (precip_prob) ezw_wr = WeatherReport(report_date, max_temperature,min_temperature, summary, raining_chance, icon) weather_reports.append(ezw_wr) json_reports = json.dumps([weather_report.__dict__ for weather_report in weather_reports]) return json_reports
You may notice that our "new restful" file just looks like our good old controller file. Yes, but we do modify 3 little parts from the file to make it simpler:
- remove geocode function
- use latitude and longitude information from input directly
- change our weather report model into JSON object
Now we are going to make our Flask RESTful api file, let's call it api.py then. The goal of this file is to receive POST request from frontend and send back the response. Let's copy following content to the file:
from flask import Flask, request from flask_restful import Resource, Api from flask_cors import CORS from ezw_restful_controller import EZWRController app = Flask(__name__) api = Api(app) CORS(app) class Ezw_API(Resource): def post(self): json_data = request.get_json() latitude = json_data['latitude'] longitude = json_data['longitude'] start_date = json_data['start_date'] end_date = json_data['end_date'] print(json_data) ezw = EZWRController() ezw_reports = ezw.getWeatherReports(start_date, end_date, latitude, longitude) return {'reports': ezw_reports} api.add_resource(Ezw_API, '/ezw_api') if __name__ == '__main__': app.run(debug=False)
We only do 2 things in this file:
- create an /ezw_api endpoint to handle POST request
- call our EZW controller to generate weather reports
Running our RESTful backend server
All files are done, yes, the coding is even simpler and shorter than our original Flask app. Let's review our file system, we should have following files under our ezw_restful folder:
/ezw_restful
   |-- api.py
   |-- ezw_model.py
   |-- ezw_restful_controller.py
When all files are present, it is the time to run our RESTful backend server. But before we run the server, please make sure you have Dark Sky API Key set in your environment. If you do not have it, go to apply it, it's free! To set the Dark Sky Key in your environment, you can:
$export DARK_SKY_KEY=<your Dark Sky Key>      //for MacOS
>SET DARK_SKY_KEY=<your Dark Sky Key>      //for Windows
When all the stuff is ready, we can type following command to start our server:
$python api.pyYou should see similar messages from your console:
 * Environment: development
 * Running on http://127.0.0.1:5000/ (Press CTRL+C to quit)
Okay, our server is started, let's call our api on a browser by typing "http://127.0.0.1:5000/ezw_api" and we have:
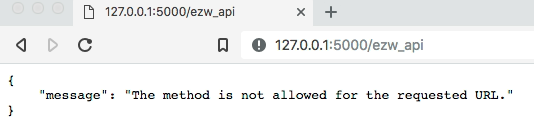
Wait, don't panic, this is our expected result. As we create a POST operation and no GET operation at all. At least, we know our server is started. :]]
Test the RESTful backend
We can test our RESTful backend using command line tool curl with JSON data. But it is always good to have a GUI on handling such task. So, let's download Postman then. This app is widely used by developers on RESTful API testing. When you run the program, we should see following interface:
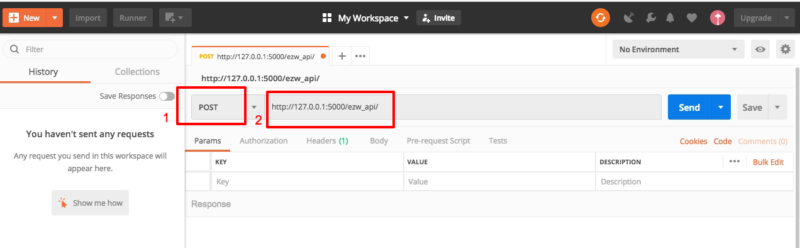
Since we are testing the POST operation, select "POST" method on spot (1), then enter our API endpoint "http://127.0.0.1:5000/ezw_api" on spot (2).
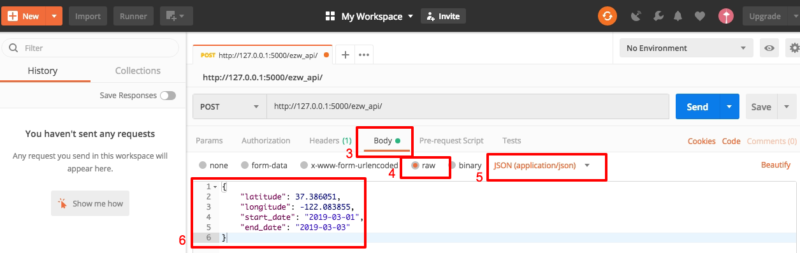
We click "Body" on spot (3) as input type, select "raw" on spot (4) and "JSON" on spot (5) as input options. After that we type following input content on spot (6): (it is Mountain View, CA, USA geographic location actually)
{
	"latitude": 37.386051,
	"longitude": -122.083855,
	"start_date": "2019-03-01",
	"end_date": "2019-03-03"
}
And click "Send", then a list of weather reports in JSON format should be returned:
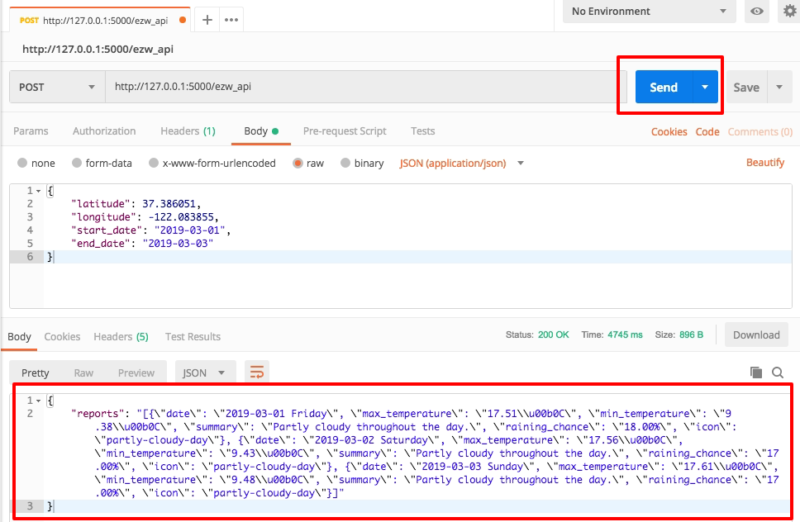
Done! We have created our working RESTful backend successfully.
Our next step is crafting a frontend module, a React frontend module. So stay tuned for Part 2!
What have we learnt in this post?
- Concept of backend and frontend modules in web application
- Creation of a Flask RESTful backend
- Usage of the Postman app on API testing
(the complete source can be found at GitHub: https://github.com/codeastar/ez_weather_forecast_flask_backend or GitLab: https://gitlab.com/codeastar/ez_weather_forecast_flask_backend)