Amazon Tutorial: Deploy a Flask Docker image in ECS


We have learnt how to build a weather forecast Flask app. We have learnt how to deploy the Flask app to a Raspberry Pi using Docker. But we mostly focus on deploying our app in a local machine or a private network. In order to step up our game, we are going to deploy the app globally with AWS (Amazon Web Services) cloud platform. So we can showcase our work to people around the world.
EC2 or ECS?
Speaking of AWS cloud platform, you may hear the term of "Amazon EC2" a lot. EC2 (Elastic Compute Cloud) is the core product of Amazon cloud platform, which provides an instance for you to do anything. You can setup a Nginx webserver or a MongoDB on EC2 instance. While ECS (Elastic Container Service) is a Docker service, which you can deploy different Docker images there. Since we are going to deploy a Flask app image, ECS is the place we are going to set our feet on.
Although we are using ECS, we still need an instance from EC2 to host the Docker container. Sounds complicated? Maybe, but we have a better solution. As Amazon launches the AWS Fargate which combines ECS and EC2 services. Once we deploy an image on Fargate, it will create its own instance, then we can sit back and enjoy launching our docker image, without dealing with any EC2 instance. But before we start to "sit back", please make sure we have processed following steps:
Prerequisite
- An AWS account (you can apply a free tier account at AWS homepage)
- AWS CLI (AWS Command Line Interface)
- An user account with proper rights to run container operations (details on the following paragraph)
- The Docker tool (the whale)
- Our weather forest Flask app, EZW! (you can get the whole source from here. Yeah, we have moved to GitLab from GitHub)
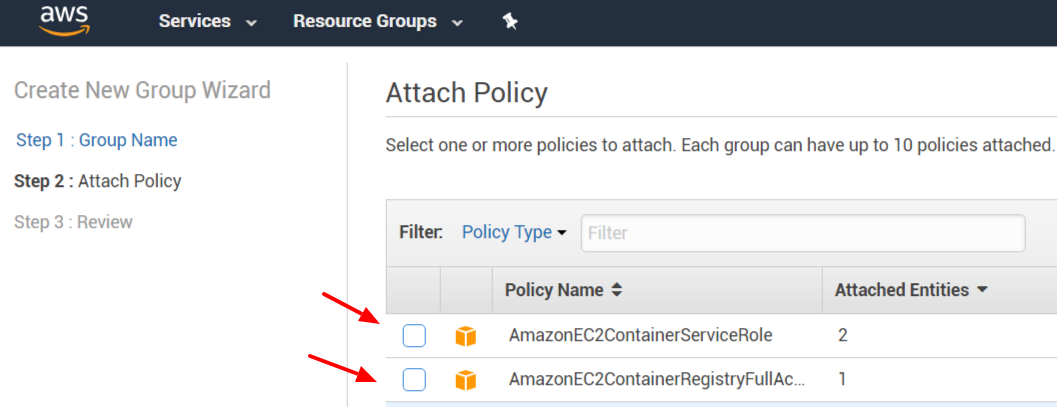
Step 1, 2, 4 and 5 are straight forward. Let's talk about step 3. First of all, we need to create an user group and an user at IAM (Identity and Access Management). In the user group creation, two group policies, "AmazonEC2ContainerServiceRole" and "AmazonEC2ContainerRegistryFullAccess" must be included in the user group.
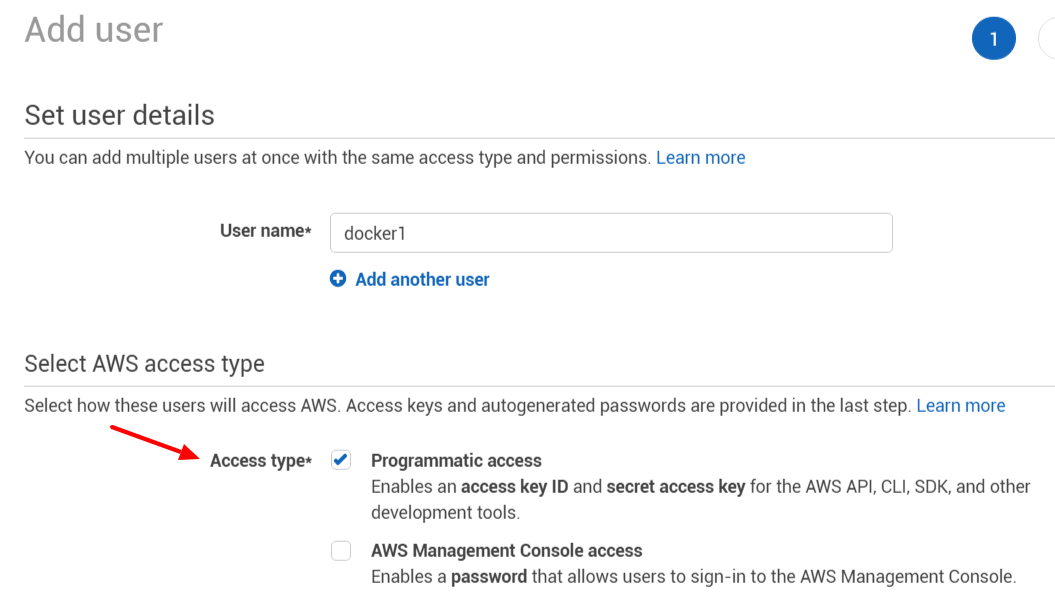
After that, we can create an user, please note that we should select "Programmatic access" for this user. Then put the user in the user group we have just created.
Dock our image
Once the account setting work is done, we go to work on our docker image. After getting our EZW Flask app source, run following command to build the docker image: $docker build -t ezw .We then run our docker image to make sure everything is okay. $docker run -d --name ezcon -p 81:5000 -e DARK_SKY_KEY=[YOUR DARK SKY API KEY] ezwPlease note that we have set 5000 as docker listening port in Dockerfile, so we input 5000 from above command. And port 81 is used here as port 80 is occupied by another web server in my machine :]] . Open a web browser and type "http://127.0.0.1:81" (or the ip address of your docker machine), you should see following screen:

That means our docker image is fine and it works on our own machine. Okay, our next mission is doing the same thing again, but this time, we do it in Amazon cloud platform.
Dock in Amazon
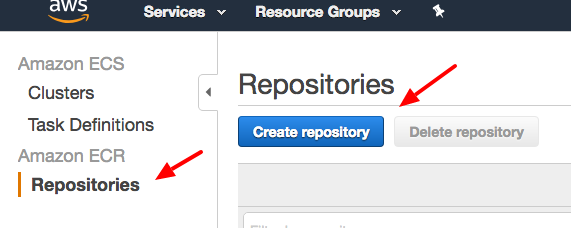
First, we go to AWS management console, and click "Elastic Container Service" (ECS). We can see the Amazon
Elastic C ontainer Registry (ECR) there, click it and press "Create repository".
It will ask you about the repository name, let's name it "ezw" then. The repository "name" is now created, but not the content. Following screen will show up to instruct us what to do next.
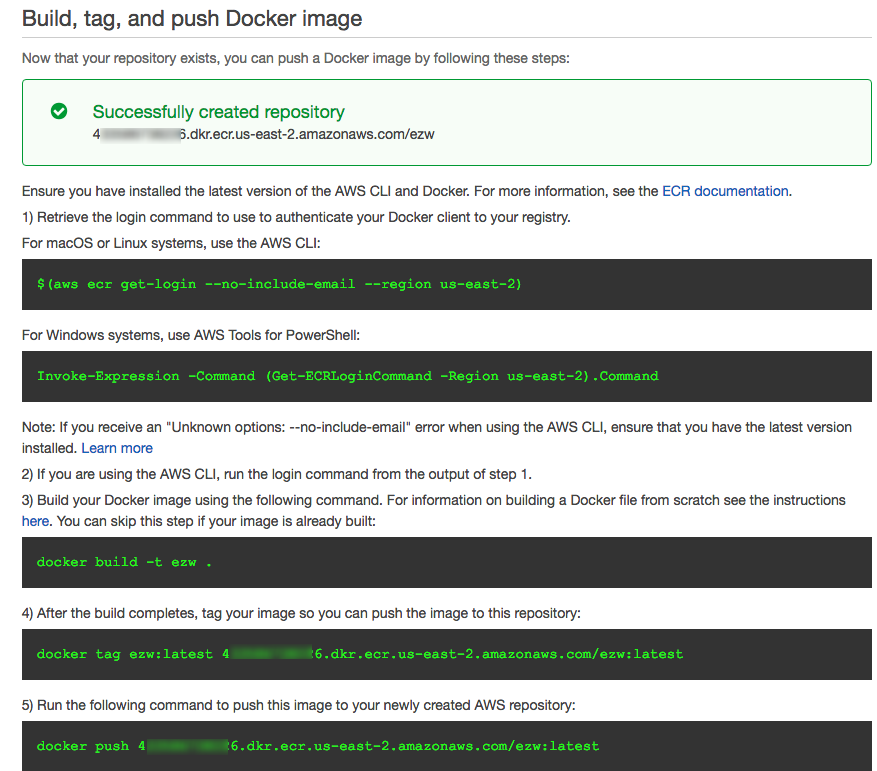
$(aws ecr get-login --no-include-email --region us-east-2)
Do you remember the user account we have created earlier? Yes, that is the account we use for logging into Amazon ECR. The "--region" is depended on the AWS region you are using.docker build -t ezw .
Build the image, yeah, we did it before.
docker tag ezw:latest 4__________6.dkr.ecr.us-east-2.amazonaws.com/ezw:latest
Tag our docker image with your own AWS id (4__________6 in my case).
docker push 4_________6.dkr.ecr.us-east-2.amazonaws.com/ezw:latest
Just push tagged image to the ECR!
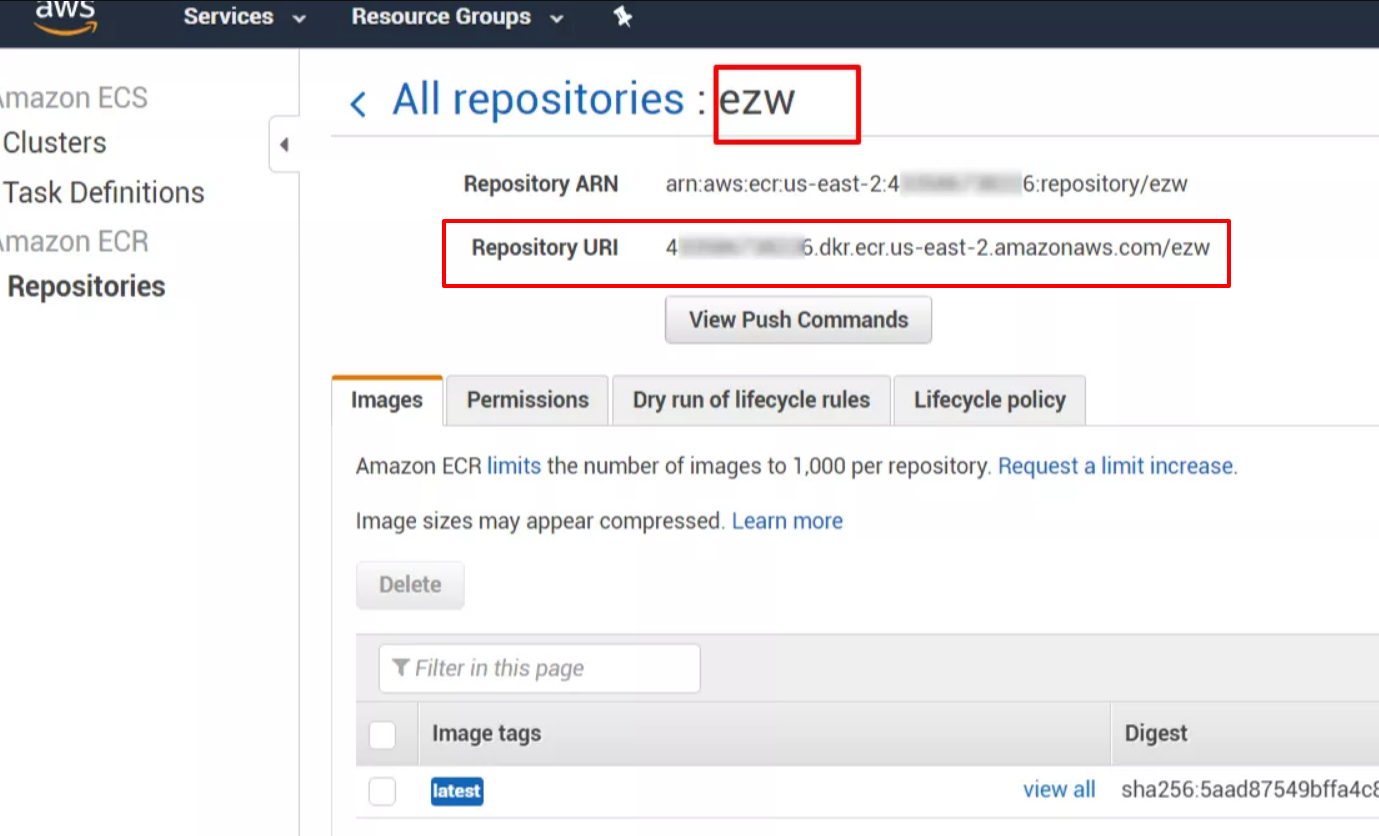
After that, our image is stored in the ECR. Remember to copy the "Repository URI", we will use it in our next step.
Launch with Fargate
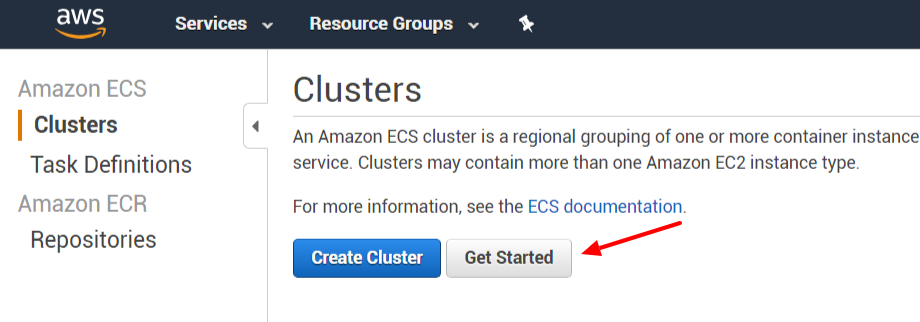
We have all our materials ready, now it is time to launch our EZW Flask app globally. We go to the ECS interface again, this time, we click "Clusters" and "Get Started".
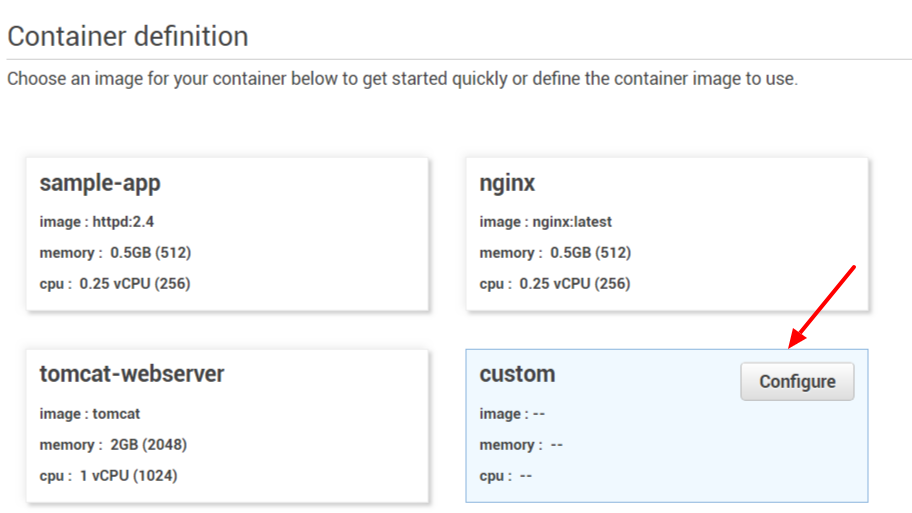
Select "custom" container and press "Configure"
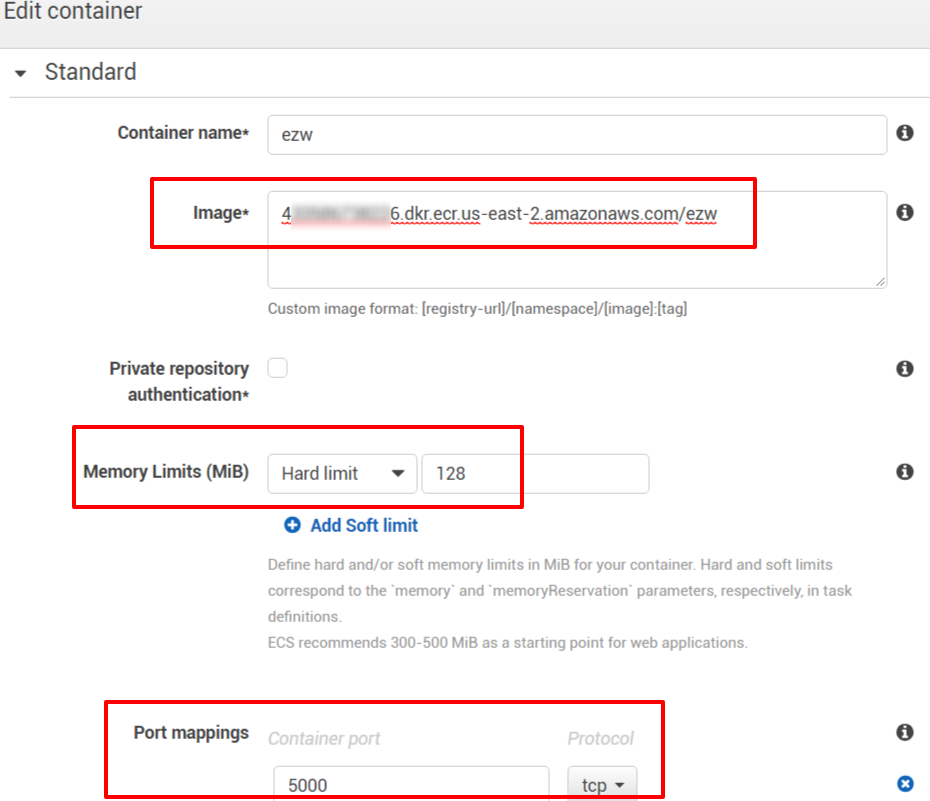
We are going to let Fargate know which docker repository to use. On the "Image" field, let's copy the "Repository URI" from our previous step to there. (if you forgot the URI, don't worry, just go to "Amazon ECR" > "Repositories" to find out, it is on the same page as ECS)
We set a hard memory limit to 128 MiB, as our weather Flask app is just a tiny web app.
Port mappings is 5000 again as we have already defined it in our Dockerfile.
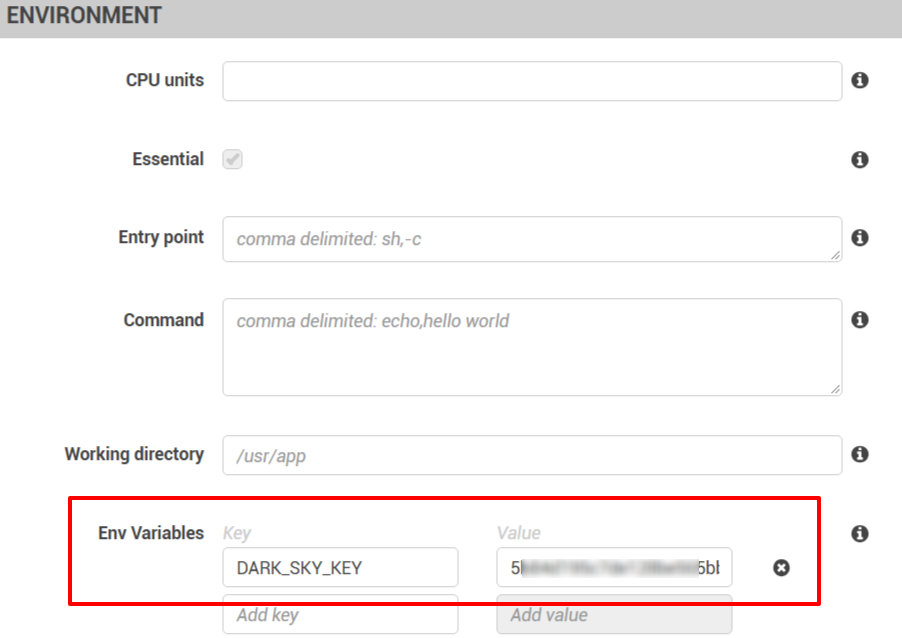
Since we store our DARK SKY API key in environment variable. We have to set it on the ECS container setting as well. From the "Advanced container configuration", create a new environment variable, "DARK_SKY_KEY" then enter your API value there.
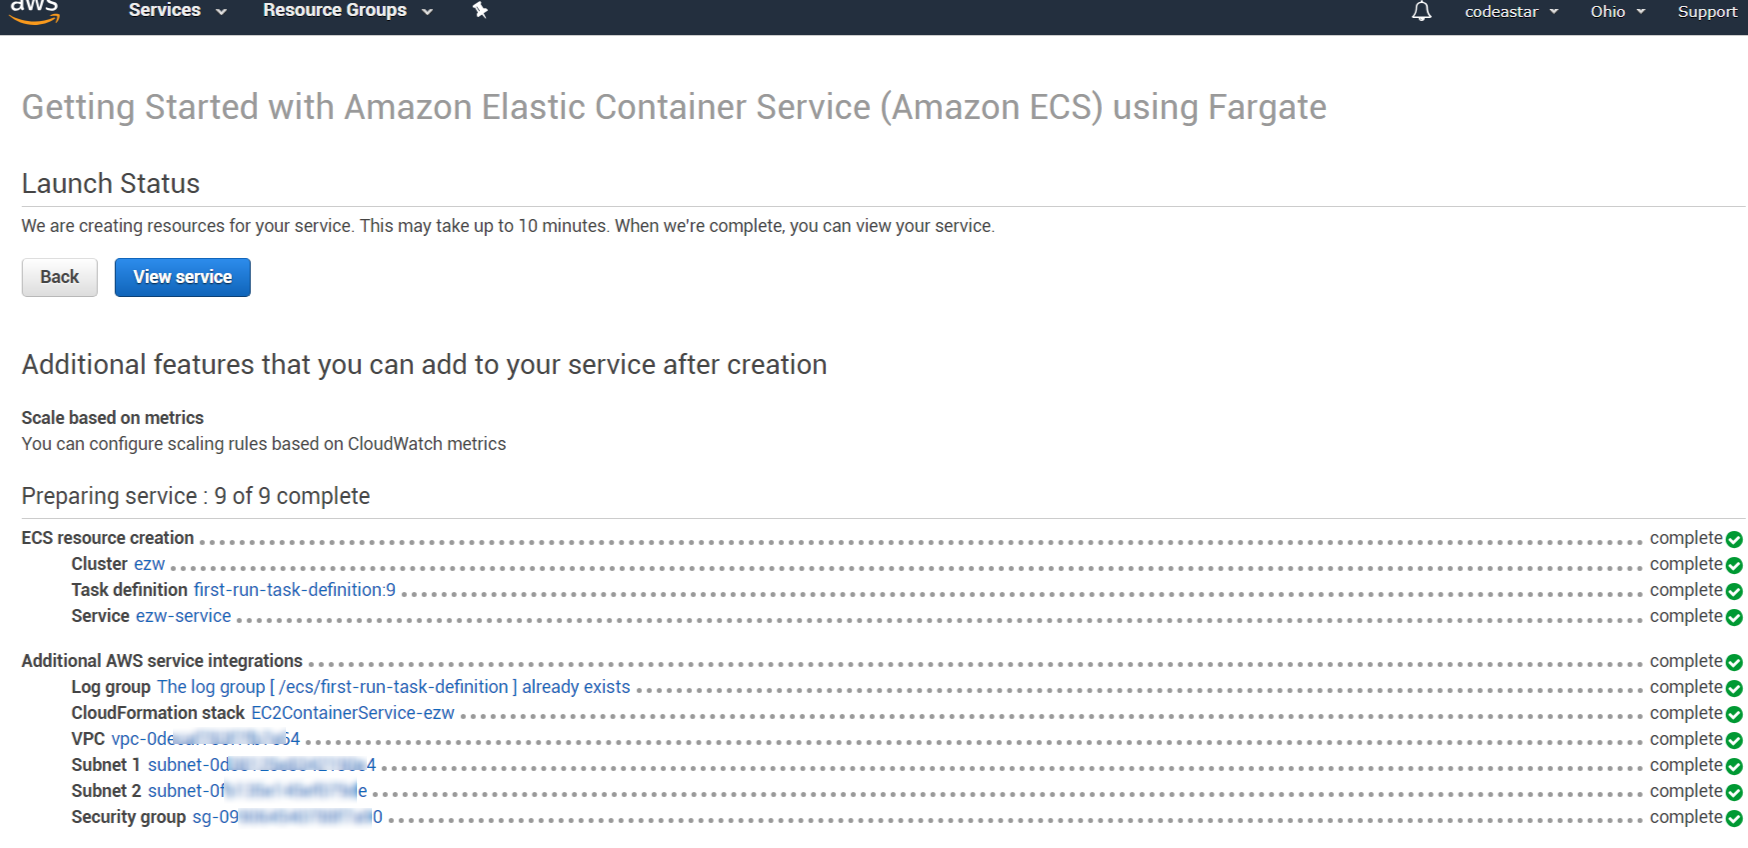
After that we can use just use the default setting and keep clicking "Next" till Amazon launch our service. We will see a similar screen when the service is ready to launch:
Okay, it is the time we try our EZW Flask App online.
Try the EZW Flask App Globally
In order to do it, we need to know the public ip first. Let's go to "Cluster" > "ezw" (or other cluster name you use for the Flask app) > "Tasks". Since we have only one task in our EZW cluster, we can click the only task there to see the details. From the "Network" section, we will find the public ip there.
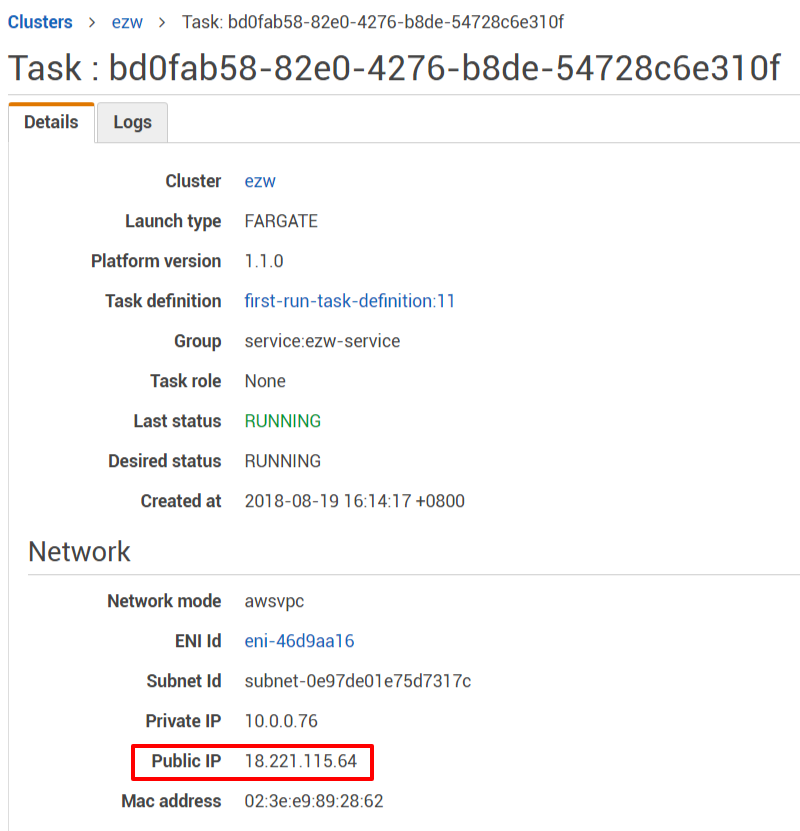
Open a browser, copy and paste the public ip there. And don't forget to add the port number at the end. Here we go:
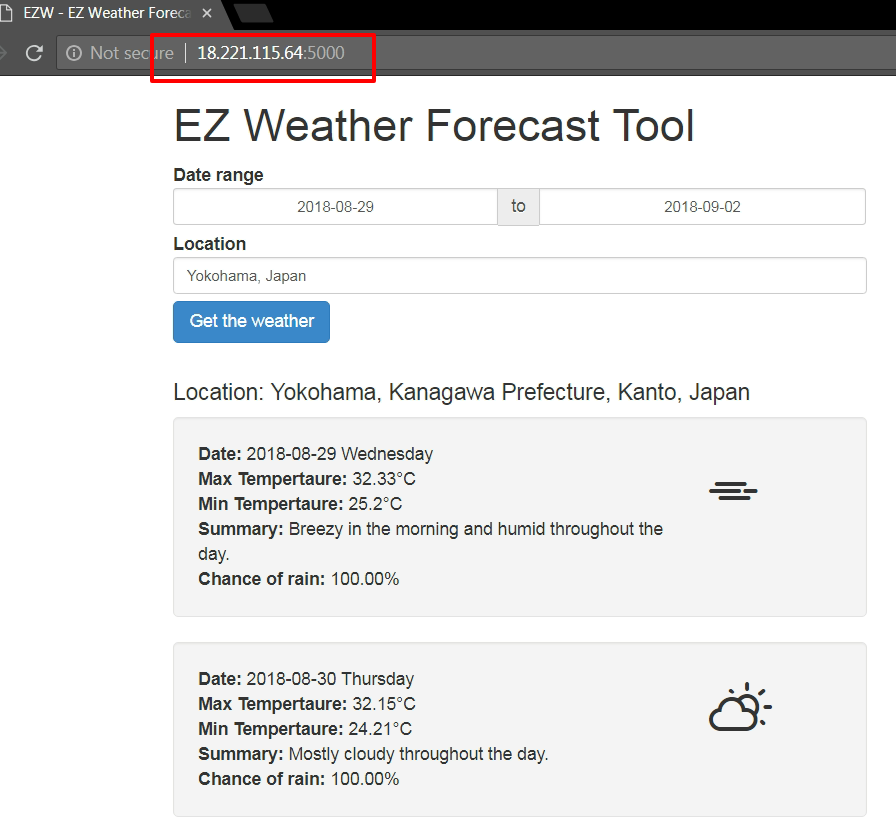
We did it! We have just deployed our first ever web app on AWS with docker. There are still many things we need to learn and tune in the AWS. Like the maintenance should be cheaper, if we use Amazon EC2 instance instead of Fargate. As we have other pricing options for EC2, like On-Demand and Spot. But Fargate provides us a fast and clean deployment environment, it is good for having a demonstration to your business partners. It can also provide a showcase to your potential employers or audiences on what you are capable of, Python, Flask, Docker, ECS and many others.
What have we learnt in this post?
- The way to push docker image to Amazon ECR
- Usage of Amazon ECS
- Usage of Fargate