AWS Tutorial: Deep Learning on Amazon Web Services

So far, we have entered several Kaggle's machine learning competitions. Most of the time, we use Kaggle's free kernel to solve the puzzles. From the Deal Probability Prediction challenge, we reached the limit of Kaggle's kernel --- the 17 GB RAM limit, while we were training our model. When we added more training data or ran more training cycles, it turned out using up the kernel memory and stopped processing. At the end, we had to trim our training scale for the limitation. Is there a better way to handle this case? Of course. We can buy a high end computer with powerful graphics cards as a deep learning machine. But it may be costly and bulky. So we have another option: we use Amazon Web Services (AWS) as our machine learning platform.
Machine Learning on a Cloud
There are 2 ways to run machine learning on AWS. First, Amazon SageMaker. The SageMaker is a fully managed service for machine learning. In this service, Amazon will provide ML optimized instances and algorithms for developers. So developers can focus on training their models (the grey part in the following diagram). Then leave server management, endpoint interface and deployment stuff to Amazon.
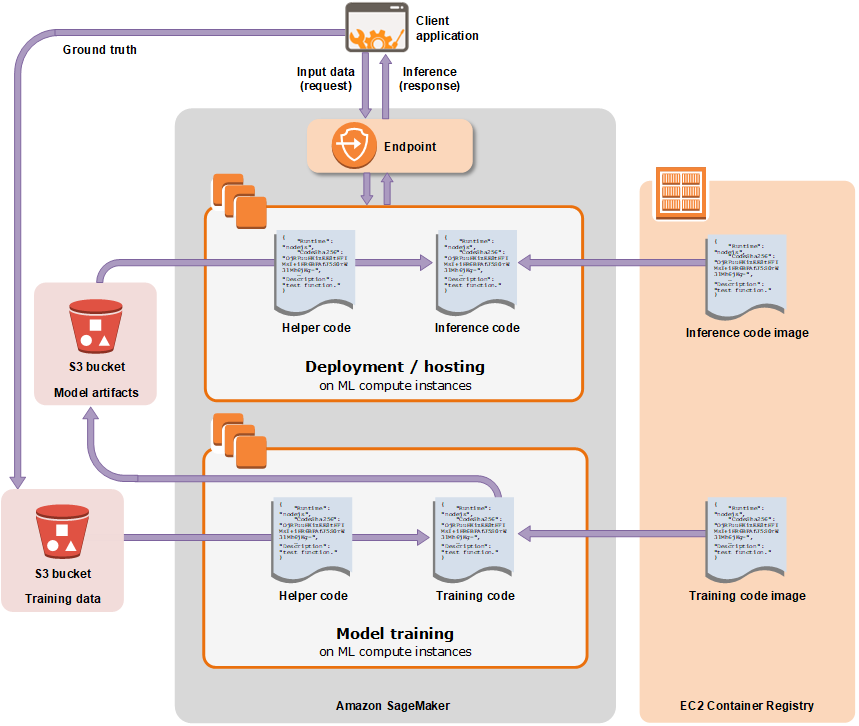
(image source: https://docs.aws.amazon.com/sagemaker/ )
Other than SageMaker, we can use the traditional way to run ML on AWS --- the EC2 way. i.e. We open an EC2 instance on AWS, then run ML on it.
If you are looking for a straight to production data science solution, SageMaker will be the service you want. Since we are looking for a ML platform to replace Kaggle's kernel, the "ALL-YOU-CAN-DO" EC2 instance can port our ML work easily.
EZ EC2 setup for Machine Learning
Like the last time we deployed our Flask app docker on Amazon, we must have an AWS account to run following exercise.
Once the account is ready, let's go to the AWS admin console.
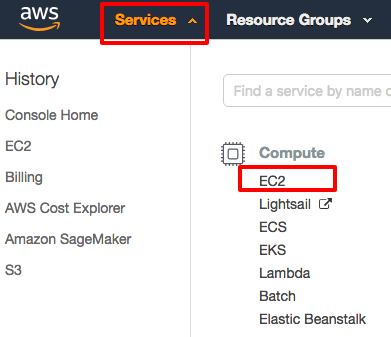
First, we go to EC2 service page by clicking "Services" and then "EC2" at the top of the menu bar.
Then we click the "Launch Instance" button to create our instance.

We are now in the Amazon Machine Image (AMI) selecting page. As we are creating a Deep Learning instance, so we enter "Deep" as the image keyword. Amazon will then show us a list of related AMIs.
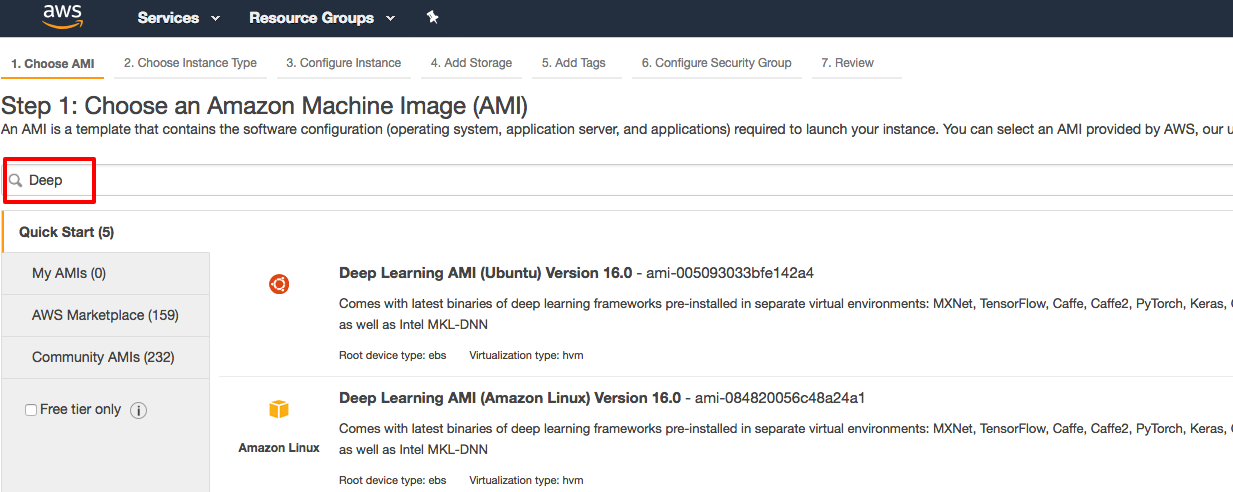
I select "Deep Learning AMI (Ubuntu) Version 16.0" as our image, because it is integrated with deep learning frameworks we need. You can also select other images to build and customize your deep learning frameworks.
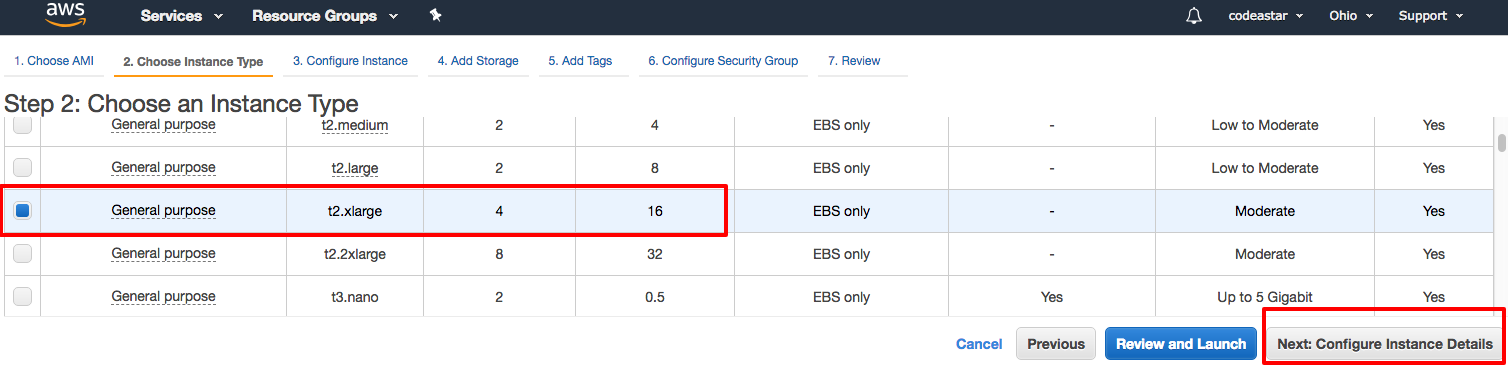
Then we are at the instance type selection page. There are different kinds of instance, some of them are for general purpose, some of them are memory optimized and some of them, well, are GPU included. And once my uncle told me, "With great power comes great.... pricing". We can check out the EC2 pricing here, and pick a valuable and useful instance for our projects.
As we are making a Kaggle's kernel replacement, we should find an instance with similar config. So I pick "t2.xlarge" instance with 16GB RAM which costs USD 0.1856 per hour. We then click "Next: Configure Instance Details" to continue.
After that, we keep clicking "Next" buttons until we go to "Step 6: Configure Security Group".
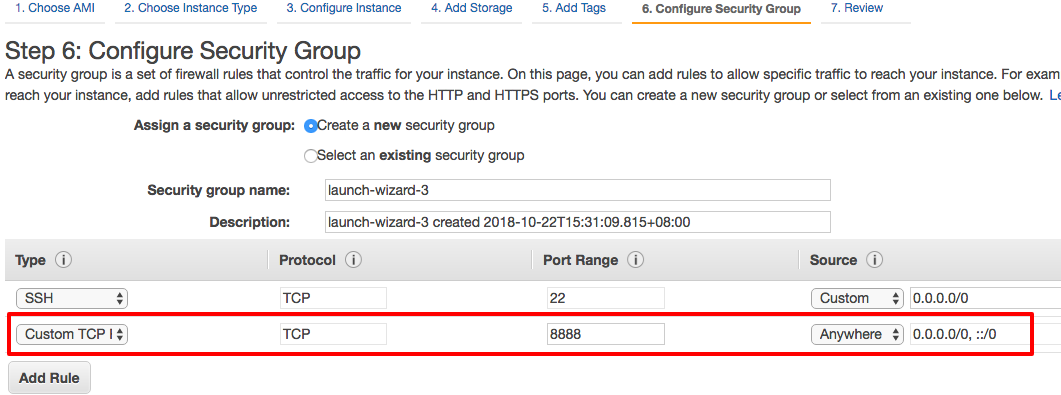
For Jupyter
It is an important step, don't miss it
Since we will use jupyter notebook on our deep learning instance. We must open the jupyer notebook port (default: 8888) for us to access. On "Step 6" interface, let's click "Add Rule" to add new network security setting, then enter "8888" in port range. I select "Anywhere" on source for easy access. You can change the source to "My IP", so only you can access the jupyter notebook.
After that, we click "Review and Launch" at the bottom to the review page. Finally, we are just one step away from starting our deep learning EC2 instance.
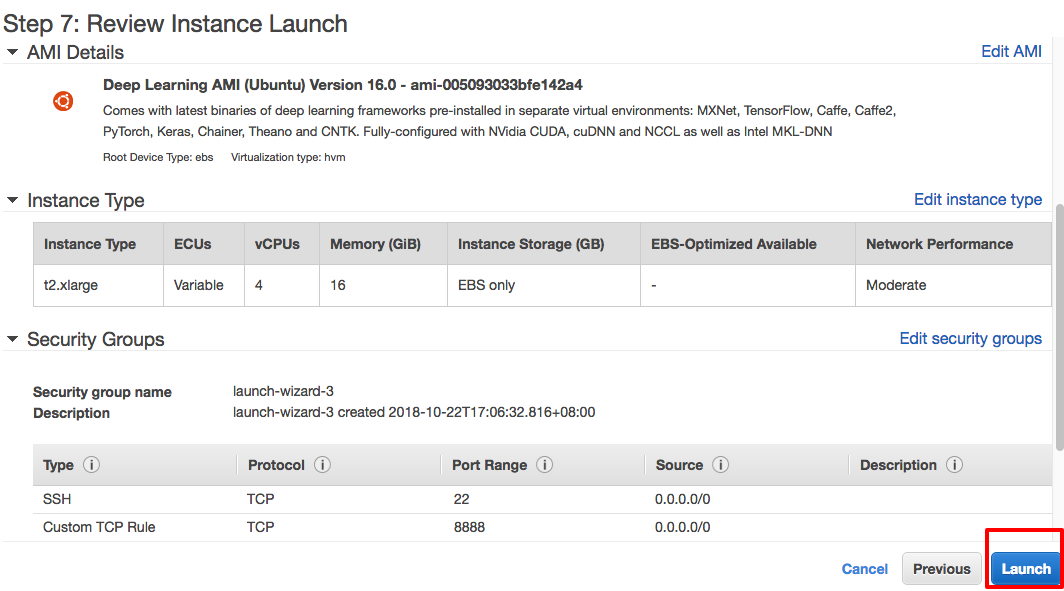
What are you waiting for? Let's click the "Launch" button!
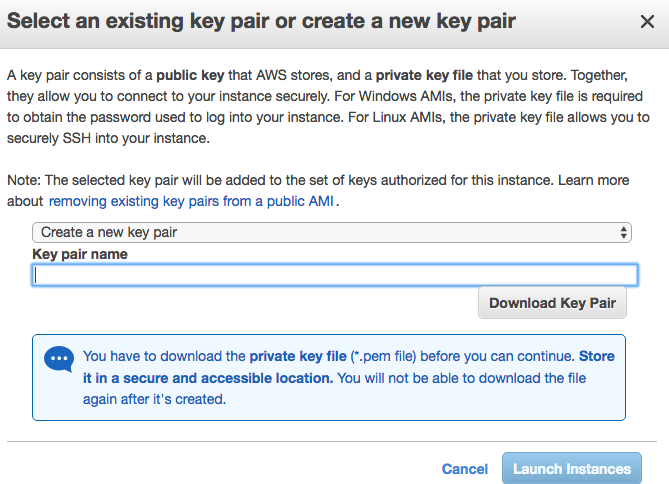
Amazon will then ask us to create or use existing key pair to access our instance. Remember to pay extra attention on the private key file, as it is our only key to open the door of the instance.
Running Deep Learning on EC2
After all of the setup process, it is now the time to connect our deep learning instance. It will be more straight forward if you are using Mac OS / Linux. From the Instance home page, we can click the "Connect" button, Amazon will display all the necessary commands for connection (remember to replace the private key file and the public DNS to your own values).
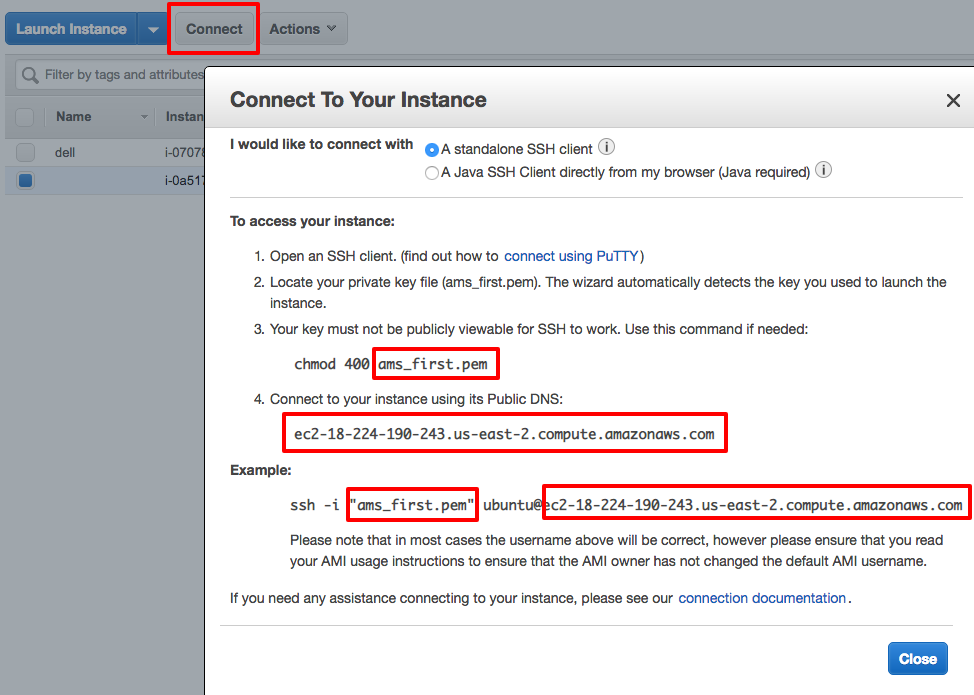
For Windows OS users, we can use PuTTY to change the PEM file to PPK file , then connect the instance via the PuTTY client. For more details, you can check the official Amazon document here.
Once you have connected the instance, no matter using Mac OS way or Windows OS way, you will see similar screen from your SSH client:
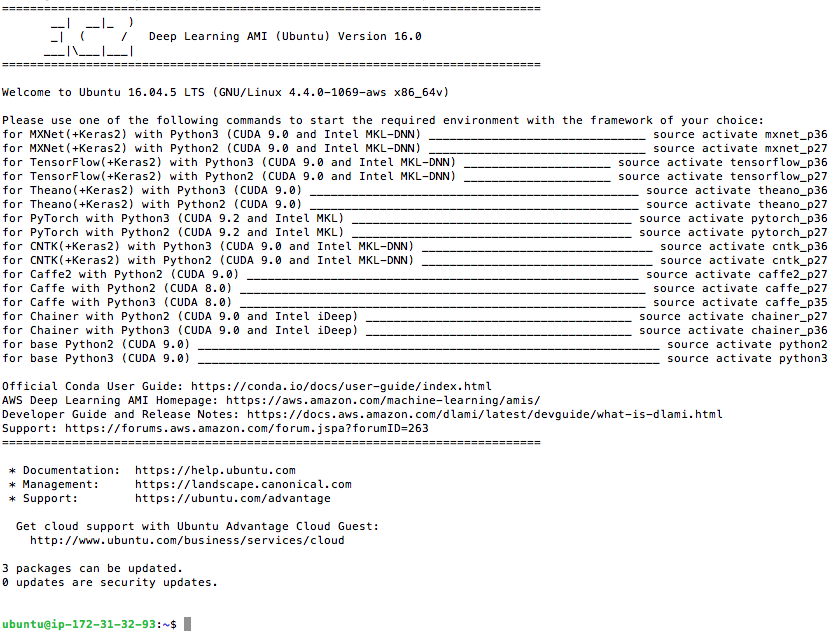
Ohhhhhhhh Yeah~ We are now in the deep learning instance we have created. There so many deep learning frameworks installed. Let' start our journey from our familiar framework, TensorFlow with Keras. So we run following commands:
$ source activate tensorflow_p36 $ jupyter notebook --no-browser
The jupyter notebook server is now started at our instance:

Training on the Cloud
Our jupyter server is started, now we can code our machine learning on a browser. But wait, since the jupyter server is started on an EC2 instance, we need to create a client connecting to the instance from our machine. Depending on the OS you are using, there are different ways to create a client to EC2. You can take a look on Amazon's official document here. I have tried both Windows and Mac ways, it should be no problem for everyone.
Once the client is ready, we connect to the jupyter notebook by typing http://127.0.0.1:8157 (Mac OS) or http://127.0.0.1:8888 (Windows OS) on a browser. Following screen will show up for asking your jupyter notebook token.
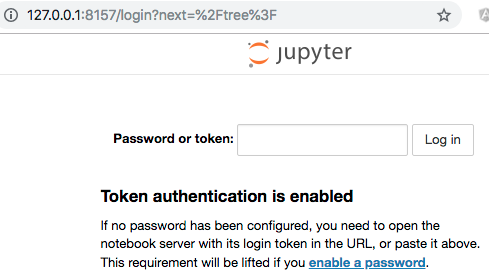
We can run following command from the client on the EC2 instance to get the juypter token.
$jupyter notebook list
After entering the right token, finally, we are here:
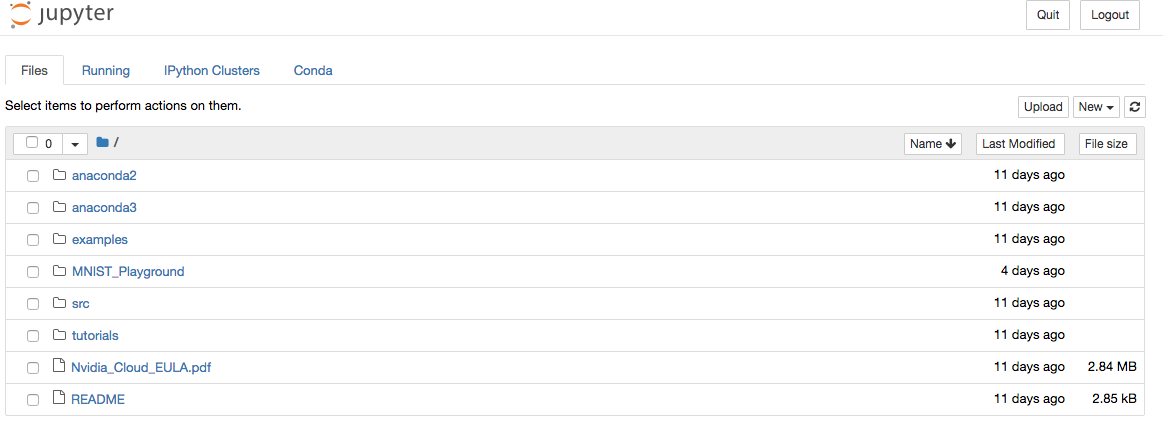
The next things we do are the usual things we do in Kaggle's kernel / self-hosted Anaconda: creating a new notebook, uploading input datasets, training and testing our model.
AWS Deep Learning Hands-On
In programming world, "doing" is always the best way of learning. Let's pick our CNN digit recognizer as our learning material.
We create a jupyter notebook on our browser, then simply copy the source from the CNN post (complete source can be found at the bottom of that post) and run it.
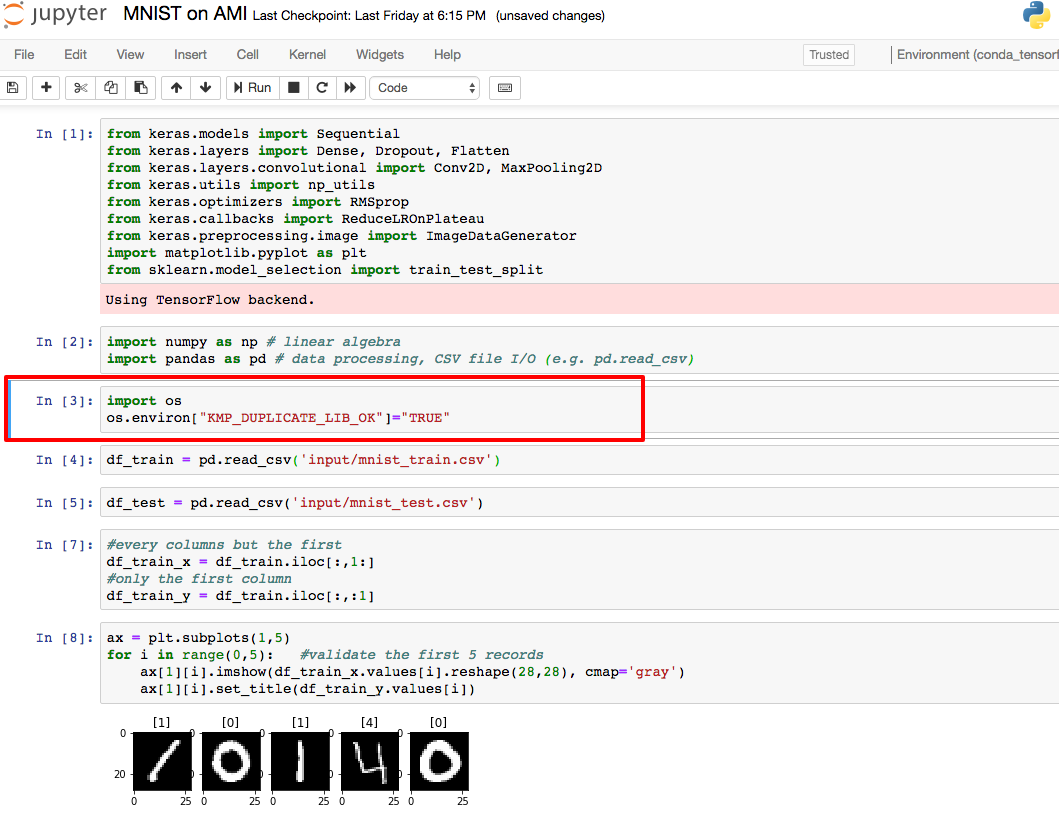
Please note that there are 2 extra lines we have added for this EC2 version:
import os os.environ["KMP_DUPLICATE_LIB_OK"]="TRUE"
I find there are more than one OpenMP runtime linked to jupyter, so I set KMP_DUPLICATE_LIB_OK to TRUE for a quick and ugly fix at this moment.
After running all the lines, it generates the prediction using the model we train in the EC2 instance.
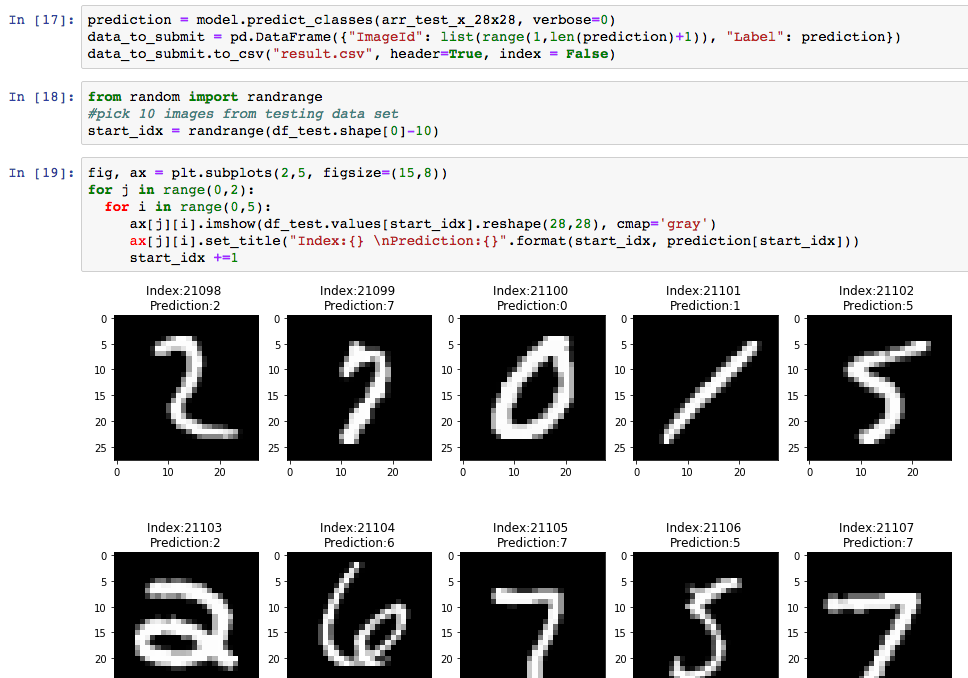
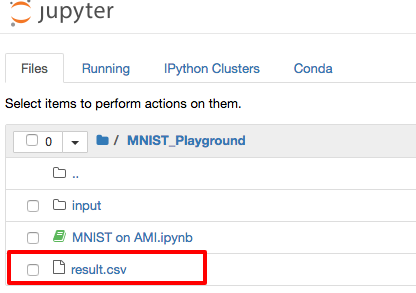
We can save the result file in our machine and submit to Kaggle later.
Now we have a new development environment for our machine learning challenge. And it is scalable! When we need a more powerful environment, we can change it from EC2 admin console. So there is no more excuse for hardware limitation on getting better score in Kaggle's challenges :]]
Last but not Least
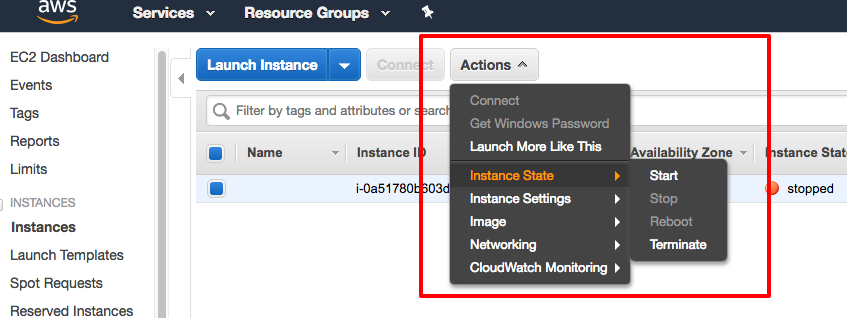
It is all about money. As EC2 instance is charged per hour, don't forget to shut down your instance after using it.
What have we learnt in this post?
- Understanding 2 kinds of ML solution from Amazon
- Setting of EC2 instance for ML
- Running a Kaggle's deep learning challenge on EC2
- Closure of EC2 ML instance